
程序自动将本地图片上传到微博相册(二)

程序自动将本地图片上传到微博相册(一)
程序自动将本地图片上传到微博相册(二)
目的
在 “程序自动将本地图片上传到微博相册(一)” 中我们实现了本地图片上传到微博相册的功能,这里我们对其进一步完善。
完善内容有:
1、目前的 ChromeDriver 路径是写死在代码中的 → 修改成 可配置的
2、上传的本地文件是写死在代码中的 → 修改成从数据库读取的
知识点
Spring Boot 配置
Spring Boot 配置数据源
配置 ChromeDriver
1、在 application.yml 中添加配置
chrome-driver:path: /Users/adminqian/shen/soft/chromeDriver/chromedriver
2、添加 config 文件夹,后面其他的配置也放在此文件夹内。新建类 ChromeDriverConf,内容如下:
import org.springframework.boot.context.properties.ConfigurationProperties;import org.springframework.context.annotation.Configuration;@Configuration@ConfigurationProperties(prefix = "chrome-driver")public class ChromeDriverConf {private String path;public String getPath() {return path;}public void setPath(String path) {this.path = path;}}
在控制器中添加 ChromeDriverConf,并修改 start 方法
@Autowiredprivate ChromeDriverConf chromeDriverConf;@ResponseBody@GetMapping("/start")public String start() {gl>System.setProperty("webdriver.chrome.driver", chromeDriverConf.getPath());ChromeOptions chromeOptions = new ChromeOptions();driver = new ChromeDriver(chromeOptions);driver.get("https://photo.weibo.com/upload/index?prel=p5_1#3500590076519405");return "chrome driver 初始化成功";}
配置数据库
我们将需要上传到微博相册的图片信息,存在数据库中,然后读取数据库获取需要处理的图片。
我们先构建数据库,数据库脚本如下:
create DATABASE lab;CREATE TABLE `file` (`id` int(10) unsigned NOT NULL AUTO_INCREMENT COMMENT '主键',`name` VARCHAR(200) DEFAULT '' COMMENT '文件名字',`serverPath` VARCHAR(300) DEFAULT '' COMMENT '文件路径',`weiboSyncState` int(11) DEFAULT '0' COMMENT '微博同步状态:0-待同步,1-同步成功,2-同步失败'`weiboSyncMsg` VARCHAR(2500) DEFAULT '' COMMENT '同步信息',`weiboId` varchar(200) DEFAULT '' COMMENT '微博图片id',`createTime` datetime DEFAULT CURRENT_TIMESTAMP COMMENT '创建时间',`status` tinyint(4) DEFAULT '1' COMMENT '记录状态:0-删除 1-正常',PRIMARY KEY (`id`) USING BTREE) ENGINE=InnoDB DEFAULT CHARSET=utf8 COMMENT='文件表';
程序增加访问数据库的功能
数据库建立之后,在程序中的基本改动如下
(1)添加依赖
在 pom.xml 文件中添加 MySQL 访问的驱动程序 和 连接池,连接池使用的是 HikariCP。
<dependency><groupId>com.zaxxer</groupId><artifactId>HikariCP</artifactId><version>3.4.5</version></dependency><dependency><groupId>mysql</groupId><artifactId>mysql-connector-java</artifactId><version>8.0.12</version></dependency>
(2)在 application.yml 中添加数据源配置
spring:datasource:mysql:JdbcUrl: jdbc:mysql://127.0.0.1:3306/lab?useSSL=false&serverTimezone=Asia/Shanghai&allowMultiQueries=trueDriverClassName: com.mysql.cj.jdbc.DriverUsername: rootPassword: 123456
(3)在项目中补充数据库访问需要的文件,并将其放在 db 目录下
- DataSourceItem.java
- DBHelper.java
- IResultHandler.java
- PagedResponse.java
- ParamsHelper.java
- ResultSetHelper.java
这些文件可以在这里下载:
https://github.com/shenqiangbin/toutiao/tree/weiboDemo/weibotest/src/main/java/com/sqber/weibotest/db
主要用到的是 DBHelper 类,通过传递一个 DataSource 后,就可以执行基本的增删改查、分页查询等操作。还可以动态传递数据源配置,去不同的数据源查询。
(4)配置数据源
在 config 文件夹下新增 DataSourceConf.java 文件。这里可以配置多个数据源,只需要在 application 配置文件中添加数据源信息即可。这里只用到一个 MySQL 数据源。然后再通过默认的数据源构建一个默认的 DBHelper。在使用的时候使用 @Autowired 注入上 DBHelper 即可。
package com.sqber.weibotest.config;import com.sqber.weibotest.db.DBHelper;//import org.springframework.beans.factory.annotation.Qualifier;import org.springframework.boot.context.properties.ConfigurationProperties;import org.springframework.boot.jdbc.DataSourceBuilder;import org.springframework.context.annotation.Bean;import org.springframework.context.annotation.Configuration;import org.springframework.context.annotation.Primary;import javax.sql.DataSource;@Configurationpublic class DataSourceConf {@Bean@Primary@ConfigurationProperties(prefix = "spring.datasource.mysql")public DataSource dataSource() {return DataSourceBuilder.create().build();}@Bean@Primarypublic DBHelper primaryDbHelper(DataSource dataSource) {return new DBHelper(dataSource);}// 多数据源:在有一个数据源时,配置如下// @Bean("secondDataSource")// @ConfigurationProperties(prefix = "spring.datasource.psg") // application.properteis中对应属性的前缀// public DataSource dataSource2() {// return DataSourceBuilder.create().build();// }//// @Bean("postgre")// public DBHelper postgreSqlHelper(@Qualifier("secondDataSource") DataSource dataSource) {// return new DBHelper(dataSource);// }// /**// * 其他地方使用:// * @Autowired// * @Qualifier("postgre")// * private DBHelper postgreHelper;// */}No newline at end of file
文件表业务逻辑
程序基本的访问数据库功能有了之后,我们来编写文件表的业务逻辑。
我们再新增三个文件夹 dao 、 service 和 model 。
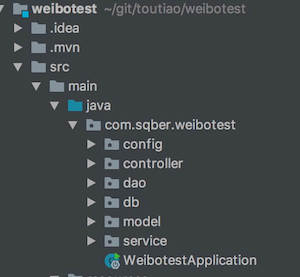
dao 就是 数据库访问层 相关的文件
service 就是 服务层 相关的文件
model 就是 实体 相关的文件
(1)新增数据库访问:在 dao 文件夹新增 FileDao.java 文件。业务逻辑有:
- 【新增】新增一个文件
- 【查询】查询未处理的10个文件
- 【更新】更新文件的状态、微博id
注意: 操作数据库时,一般使用 SQL参数化 的形式进行操作,避免 SQL注入
具体内容如下:
package com.sqber.weibotest.dao;import com.sqber.weibotest.db.DBHelper;import com.sqber.weibotest.db.ParamsHelper;import com.sqber.weibotest.model.MyFile;import org.springframework.beans.factory.annotation.Autowired;import org.springframework.stereotype.Repository;import java.sql.SQLException;import java.util.List;@Repositorypublic class FileDao {@Autowiredprivate DBHelper dbHelper;public int add(String name, String serverPath) throws SQLException {Object[] arr = new Object[]{name,serverPath};String sql = String.format("insert file(name,serverPath) values(%s)",ParamsHelper.createStr(arr.length));return dbHelper.add(sql, arr);}/*** 获取需要处理的文件(获取10个)** @return* @throws Exception*/public List<MyFile> getNeedHandle() throws Exception {String sql = "select * from file where weiboSyncState = " + MyFile.WeiboSyncState_NOHand + " limit 10";return dbHelper.simpleQuery(sql, null, MyFile.class);}public void updateState(Long id, Integer state, String info, String picId) throws SQLException {String sql = "update file set weiboSyncState = ?,weiboSyncMsg=?,weiboId=? where id = ?";dbHelper.update(sql, new Object[]{state, info, picId, id});}}
(2)新增实体: 在 model 文件夹新增一个 MyFile.java。内容如下:
package com.sqber.weibotest.model;public class MyFile {public static final Integer WeiboSyncState_NOHand = 0;public static final Integer WeiboSyncState_SUCCESS = 1;public static final Integer WeiboSyncState_FAIL = 2;private Long id;private String name;private String serverPath;private Integer weiboSyncState;// getter setter 略}
(3)新增文件服务:在 Service 层新增 FileService.java 文件。内容如下:
package com.sqber.weibotest.service;import com.sqber.weibotest.dao.FileDao;import com.sqber.weibotest.model.MyFile;import org.springframework.beans.factory.annotation.Autowired;import org.springframework.stereotype.Service;import java.sql.SQLException;import java.util.List;@Servicepublic class FileService {@Autowiredprivate FileDao fileDao;// 增public int add(String name, String serverPath) throws SQLException {return fileDao.add(name, serverPath);}// 删// 改public void updateState(Long id, Integer state, String info, String picId) throws SQLException {fileDao.updateState(id,state,info,picId);}// 查public List<MyFile> getNeedHandle() throws Exception {return fileDao.getNeedHandle();}}
(5) 然后在 HomeCtroller 中新增一个从数据库读取,并同步到微博相册的接口
/*** 将数据库中待同步的文件同步到微博相册* @return* @throws Exception*/@ResponseBody@GetMapping("/browser/db")public String db() throws Exception {List<MyFile> list = fileService.getNeedHandle();for(MyFile item : list){String picId = this.go(item.getServerPath());fileService.updateState(item.getId(), MyFile.WeiboSyncState_SUCCESS, "", picId);//String pic = "https://wx4.sinaimg.cn/mw690/" + str + ".jpg";//String pic = "https://wx4.sinaimg.cn/large/8e2ef8f7gy1gp171tmfldj20go0l21kx.jpg";//return pic;}return "ok";}
在页面上调用 /browser/db 就可以测试是否能够将数据库中记录的本地文件上传到微博相册(先要调用 /start 接口登录微博)。
我们在数据库中存的只是一个 id 信息。使用的时候可以拼接一下地址。
String pic = "https://wx4.sinaimg.cn/mw690/" + str + ".jpg"; 这个是压缩图片String pic = "https://wx4.sinaimg.cn/large/" + str + ".jpg"; 这个是原始图片
至此,可配置 和 数据库读取 就完了。
后续我们将数据库读取修改成定时任务模式,不用再人为干预,我们只是往数据库插入数据,定时任务去将图片上传到微博相册。
*昵称:
*邮箱:
个人站点:
*想说的话: